Key Takeaways
- Heat pumps provide heating and cooling by transferring heat.
- Correct sizing, airflow, and installation quality are essential to comfort.
- Climate, home efficiency, ductwork, and electrical capacity affect the right system.
- Total ownership cost matters more than equipment price alone.
- Load calculations, permits, commissioning, and maintenance help protect performance.
A heat pump upgrade can replace separate heating and cooling equipment with one system designed to move heat in either direction. When considering AC Heat Pumps, start by evaluating how your home performs today instead of choosing equipment based only on a headline efficiency rating or a low quote.
The best plan accounts for the home’s insulation, ductwork, electrical service, climate, room-by-room comfort needs, and local energy costs. Taking these steps before an old system fails can give you more time to compare options, clarify installation details, and avoid an emergency decision.
1. Start With The Home, Not The Equipment
Review the age, repair history, and daily performance of your current furnace, air conditioner, or heat pump. Frequent repairs, noisy operation, short cycling, rising utility bills, and rooms that stay noticeably warmer or colder than others all signal that the overall system deserves attention. Also inspect accessible duct connections, insulation levels, window condition, and obvious air leaks. A new system cannot fully solve problems caused by a drafty, poorly insulated home or restricted airflow.
2. Know How A Heat Pump Works
A heat pump uses electricity to transfer heat rather than creating it through on-site combustion. In summer, it moves heat from indoors to outdoors. In winter, it draws available heat from outside air or another source and transfers it inside. The U.S. Department of Energy’s heat pump system basics explain why this process can serve homes in both heating and cooling seasons.
Common System Types
- Ducted air-source systems: Use central ductwork to distribute conditioned air.
- Ductless systems: Use indoor units for individual rooms or zones without major duct installation.
- Ground-source systems: Exchange heat with the ground and typically require more site work.
- Dual-fuel systems: Pair a heat pump with a furnace that can provide backup heat when needed.
3. Match The System To The Local Climate
Climate should shape the equipment search. Ask how often temperatures fall below freezing, how long the cooling season lasts, whether summer humidity is a concern, and whether backup heat is appropriate. A home in Maine may need strong low-temperature heating capacity and a clear backup-heat strategy. A home in Arizona may place greater emphasis on cooling efficiency and comfort during long, hot weather. Cold-climate models can be suitable for colder regions, but their published low-temperature capacity should be compared carefully.
4. Check Ductwork, Airflow, And Electrical Capacity
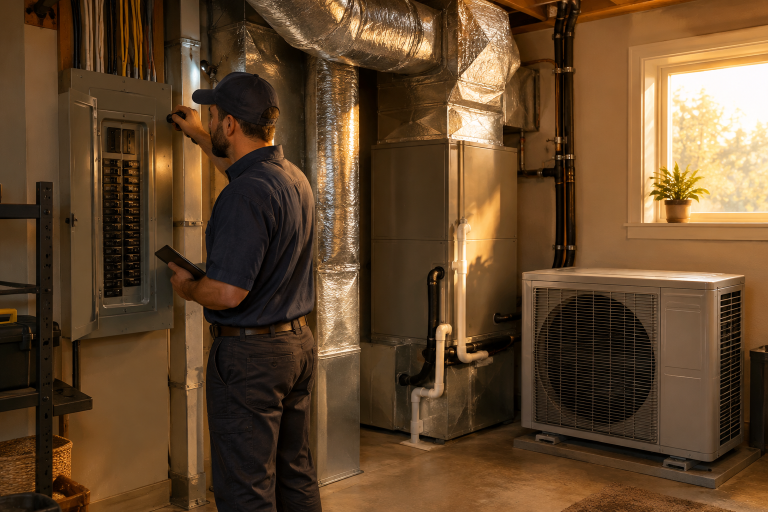
Leaky, undersized, disconnected, or poorly balanced ducts can limit comfort and raise operating costs. Ask the contractor to examine supply registers, return-air paths, filter size, and accessible duct sections. Older homes may also need an electrical assessment because a new system can require panel space, new wiring, or a disconnect. Permit and code requirements vary by location, so confirm who is responsible for permits, inspections, and any required electrical work.
5. Get The Size Right Before Comparing Ratings
Bigger is not automatically better. Oversized equipment can cycle on and off too often, which may reduce humidity control, create uneven temperatures, and add wear. Undersized equipment may run for long periods and struggle during extreme conditions. Request a room-by-room heating and cooling load calculation, commonly called Manual J, before final equipment is selected. That calculation should reflect the home’s layout, insulation, windows, orientation, ducts, and expected design conditions.
6. Compare Performance Ratings In Plain Language
SEER2 measures seasonal cooling efficiency, EER2 measures cooling performance under specified test conditions, and HSPF2 measures seasonal heating efficiency. COP compares heat delivered with electricity used at a particular condition. Each number is useful, but none tells the whole story. Compare low-temperature capacity, sound levels, controls, warranty terms, local service availability, and the installer’s design. ENERGY STAR’s air-source heat pump buying guidance also emphasizes proper sizing when evaluating eligible equipment.
7. Estimate The Full Cost Of Ownership
Compare complete proposals, not just the equipment line item. Include equipment, labor, electrical upgrades, duct repairs, permits, thermostat or control changes, condensate drainage, and expected maintenance. Ask each contractor for estimated annual energy use and the assumptions behind it, including utility rates, thermostat settings, insulation condition, and how backup heat will operate. The least expensive installation may not be the least expensive choice over the system’s working life.
8. Review Rebates, Credits, And Local Programs Carefully
Available incentives can depend on the equipment model, efficiency tier, household eligibility, utility territory, installation date, and program rules. Verify requirements before signing a contract or buying equipment. Keep model numbers, paid invoices, permit records, efficiency documentation, and any contractor certifications. Program requirements can change, so use current government, utility, or program administrator information rather than relying on an old advertisement or verbal estimate.
9. Prepare The Home Before Installation Day
- Clear safe access to indoor and outdoor equipment locations.
- Move furniture away from supply registers and return grilles.
- Address practical air leaks and replace heavily soiled filters.
- Confirm thermostat placement and condensate drainage plans.
- Verify the installation schedule, permits, inspections, and who will handle each step.
10. Ask Better Questions During Contractor Interviews
Ask how the system size was calculated, what heating output remains at low outdoor temperatures, and whether existing ducts will be tested or repaired. Confirm possible electrical changes, annual maintenance needs, warranty-service responsibility, and the process for resolving comfort problems after installation. References from comparable homes can also reveal whether a contractor communicates clearly and follows through after the work is complete.
11. Build A Simple Maintenance Plan
Check filters regularly, keep outdoor equipment clear of leaves and debris, and make sure supply and return openings remain unobstructed. Pay attention to unusual sounds, water where it should not be, or weaker airflow. Qualified technicians should handle work involving refrigerant, electrical testing, coils, drainage components, and detailed system performance checks. Follow the manufacturer’s maintenance instructions and keep service records.
12. Common Mistakes To Avoid
- Choosing solely by the highest efficiency number or lowest bid.
- Skipping the load calculation and duct assessment.
- Ignoring insulation, air leaks, and electrical limitations.
- Assuming every heat pump has the same cold-weather performance.
- Accepting an estimate without model numbers, scope details, or permit information.
- Waiting for a complete equipment failure before beginning research.
Conclusion
A successful heat pump upgrade begins with a realistic assessment of the home. By matching equipment to the climate, confirming airflow and electrical needs, requesting a Manual J calculation, and comparing complete costs, homeowners can make a more informed decision. Careful planning and qualified installation matter just as much as the equipment selected, helping create steadier comfort throughout the year.