Halloween isn’t just about costumes and candy—it’s also one of the most creative times of the year for families to work on fun projects together. Making your own decorations can transform your home into a haunted masterpiece while giving everyone a chance to show off their artistic side. Best of all, you don’t need expensive supplies or advanced crafting skills to make your house look spooky, stylish, or silly. With a little imagination, some common household items, and teamwork, your family can create decorations that are not only festive but full of memories.
If you’re looking for ideas that kids and adults can enjoy equally, these DIY Halloween decorations are easy to make, budget-friendly, and guaranteed to bring plenty of laughs (and maybe a few goosebumps).
Paper Plate Ghosts
Simple, quick, and kid-approved—paper plate ghosts are a Halloween classic that never gets old. All you need are white paper plates, scissors, tape, and a roll of crepe paper or tissue streamers.
- Cut out eyes and a mouth in each plate, or simply draw spooky faces with a black marker.
- Attach strips of white streamers to the bottom of the plate to make the ghostly “tails.”
- Use string or fishing line to hang them from the ceiling, porch, or trees outside.
You can even give each ghost a personality—make one silly, one scary, and one sleepy. Kids will love naming their ghost creations, and these lightweight decorations flutter perfectly in the fall breeze.
Toilet Paper Roll Bats
If you’re looking to reuse materials, toilet paper roll bats are the perfect eco-friendly decoration. They’re also a great indoor craft for younger kids.
- Flatten the cardboard roll slightly and cut two small triangles at one end to form pointed ears.
- Paint the roll black or cover it with black construction paper.
- Add googly eyes and draw a tiny smile with fangs.
- Cut wings out of black cardstock or paper and tape them to the back.
You can hang them upside-down from a string or tape them to walls and doorways for a fun, not-too-scary touch.
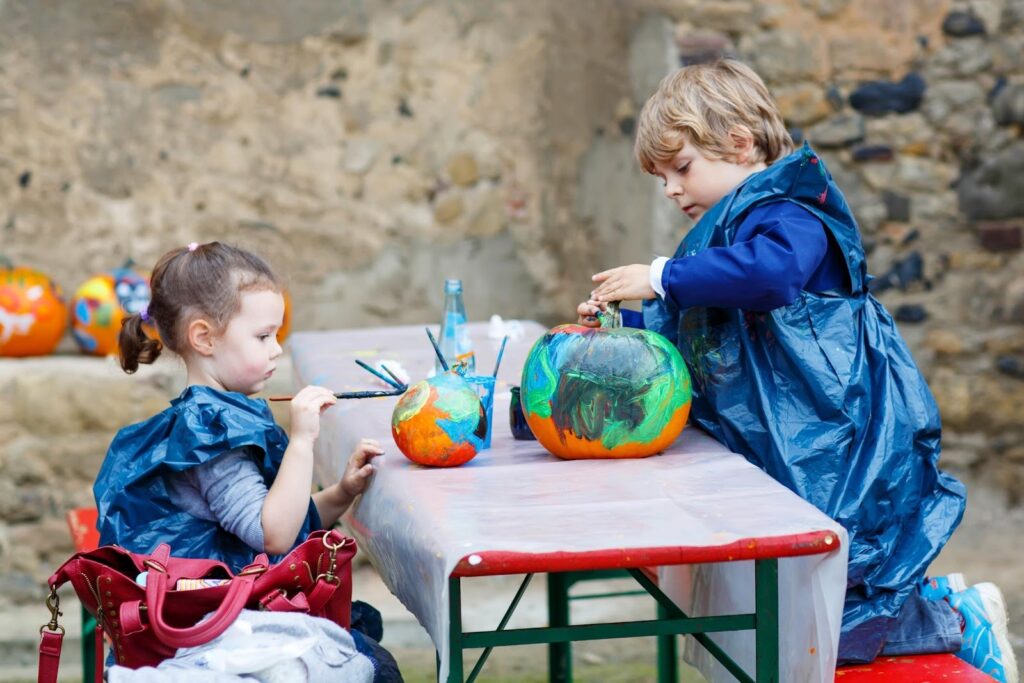
Pumpkin Painting Party
Carving pumpkins is a Halloween tradition, but it’s not always the best option for families with younger kids. Painting pumpkins offers all the creativity with none of the mess or sharp tools.
Set up a pumpkin painting station in your kitchen or backyard. Provide:
- Acrylic paints or washable kids’ paints
- Brushes and sponges
- Stickers, glitter glue, and googly eyes
Encourage everyone to design their own pumpkin character—maybe a superhero pumpkin, a glow-in-the-dark monster, or a cute animal face. If you want to keep things clean, cover the workspace with newspaper or an old sheet.
A fun twist: Have a “family pumpkin contest” where everyone displays their designs, then vote for categories like “funniest,” “most creative,” or “spookiest.”
Glow Jar Lanterns
These DIY lanterns add a soft, spooky glow to porches or tabletops, and they’re incredibly easy to make with jars you already have around the house.
- Rinse and dry old mason jars, spaghetti sauce jars, or any clear container.
- Paint Halloween designs on the outside—think jack-o’-lantern faces, bats, or ghosts.
- Once dry, place a battery-powered tea light inside (never a real candle for safety).
For an eerie effect, wrap the jar in gauze or white cheesecloth to make it look like a mummy. Tie some twine or black ribbon around the top for a finished look. These glow jars are perfect for lighting up windowsills or the front porch during trick-or-treat night.
Spooky Window Silhouettes
Want to make your house look like a haunted mansion? Paper silhouettes are simple, dramatic, and can be customized to fit any theme.
- Grab black construction paper or poster board.
- Cut out Halloween shapes—cats, witches, ghosts, or creepy trees.
- Tape them to your windows from the inside and turn on the lights behind them.
The backlighting creates spooky shadows that are visible from the street. It’s a low-cost way to make a big impact, and kids can help design and cut out the shapes.
If your kids love drawing, have them sketch their own monsters or characters to turn into window art. You can even make a “haunted window scene” where each family member contributes a different element.
Mason Jar Mummies
This craft combines a little recycling with a lot of cuteness. Mason jar mummies can double as centerpieces or lanterns.
- Wrap each jar in strips of gauze, white cloth, or toilet paper.
- Glue or tape the ends so they stay in place.
- Add googly eyes peeking through the bandages.
- Pop in a battery-powered tea light for a warm glow.
These mummy jars are quick to assemble and make a fun group activity. Each family member can decorate theirs differently—some funny, some spooky, some downright adorable.
Haunted House Cardboard Village
For families who love bigger projects, a haunted house village is a creative way to decorate your mantel, dining table, or entryway.
- Gather cardboard boxes of various sizes (cereal boxes work great).
- Cut out windows, doors, and rooftop shapes.
- Paint them black or gray and let everyone decorate with orange and white accents.
- Add paper ghosts or bats flying above with string.
You can even insert LED tea lights inside the boxes to make them glow from within. It’s a cozy, hands-on project that doubles as a Halloween display centerpiece.
Paper Bag Luminaries
Paper bag luminaries are a nostalgic decoration that’s surprisingly easy to make. All you need are paper lunch bags, scissors, and a few battery candles.
- Cut Halloween shapes—like stars, pumpkins, or bats—into the sides of each bag.
- Place a bit of sand or rice at the bottom to weigh it down.
- Add a battery-operated candle inside and line your walkway or porch with them.
The flickering lights create a magical glow that feels both festive and safe. Younger kids can help draw or stencil the designs while adults handle cutting and setup.
Creepy Crawly Garland
Garlands are a fun way to tie a room together, and this Halloween version is easy for kids to assemble.
- Cut out spider, ghost, or pumpkin shapes from colored paper.
- Decorate each one with markers or stickers.
- Use a hole punch to make two holes at the top of each cutout and string them together with yarn or ribbon.
Hang the garland along your mantel, staircase, or window frame for an instant dose of Halloween cheer.
Final Thoughts
Making DIY Halloween decorations together isn’t just about creating something spooky—it’s about creating memories. When everyone contributes, from toddlers to teens to parents, you end up with a house filled with laughter and creativity as much as cobwebs and pumpkins.
You don’t need fancy supplies or hours of crafting time. Even the simplest decorations can transform your home into a Halloween wonderland. So grab your glue sticks, paintbrushes, and imagination—and get ready to make this Halloween your most creative one yet.
When the lights dim and your handmade ghosts, bats, and pumpkins come to life, you’ll realize that the real magic of Halloween isn’t in the candy—it’s in the moments you make together.